2012年12月20日

[Azure]Auto-Scaling Application Block (1) – Configure AutoScaling Application Block

這裡我會先使用Auto-Scaling Application block來做,其實照著這一篇MSDN做其實還是相當簡單。

Auto-Scaling AB的概念是利用一隻程式去分析想要Scale的Cloud Service Role的Performance資料,當符合某些條件時,就動態的修改Role Instance數目。因此,除了必須要config Auto-Scaling AB外,目標的Cloud Service Role也必須要啟動收集Performance Counter才行。

首先,建立一個Worker Role,然後用Nuget加入Auto-Scaling Application Block。

image

image

進入project setting,確定target framework是.Net Framework 4.0

image

在WorkRole: OnStart()中呼叫AutoScaler的Start(),這樣就寫完程式了。

image

複雜的地方是要怎麼設定。

首先,手動加入兩個XML檔案 : rules.xml與services.xml,並且將他們的copy local設為true。

image

接著要開始config app.config

image

新增一個Autoscaling setting

image

打開Data Point設定

image

在這邊填上Storage相關設定,這裡所指定的Storage,是當Auto-Scaling AB啟動時,會定時將performance資料寫入的位置,Auto-Scaling AB會從這裡的資料決定是否有符合稍後我們設定的rule。

image

為了方便,我們全部都用Local File來儲存Service與Rule資料。

image

選擇剛剛產生的rule.xml

image

同樣的,使用Local File來儲存Service資料

image

選擇剛剛的service.xml

image

打開APP.CONFIG,把這個地方的路徑拿掉,只留下檔名就好。

image

我們還會需要加上下面這一段在APP.CONFIG中。

<configuration>
<!--使用diagnostic-->
<system.diagnostics>
<trace>
<listeners>
<add type="Microsoft.WindowsAzure.Diagnostics.DiagnosticMonitorTraceListener, Microsoft.WindowsAzure.Diagnostics, Version=1.8.0.0, Culture=neutral, PublicKeyToken=31bf3856ad364e35"
name="AzureDiagnostics">
<filter type="" />
</add>
</listeners>
</trace>
<sources>
<source name="Autoscaling General" switchName="SourceSwitch" switchType="System.Diagnostics.SourceSwitch" />
<source name="Autoscaling Updates" switchName="SourceSwitch" switchType="System.Diagnostics.SourceSwitch" />
</sources>
<switches>
<add name="SourceSwitch" value="Verbose, Information, Warning, Error, Critical" />
</switches>
</system.diagnostics>
<runtime>
<assemblyBinding xmlns="urn:schemas-microsoft-com:asm.v1">
<dependentAssembly>
<assemblyIdentity name="Microsoft.WindowsAzure.StorageClient"
publicKeyToken="31bf3856ad364e35"
/>
<!-- Auto-Scaling使用1.1版的StorageClient,將之轉為1.7版 -->
<bindingRedirect oldVersion="1.1.0.0"
newVersion="1.7.0.0"/>
</dependentAssembly>
</assemblyBinding>
</runtime>
</configuration>


打開service.xml,從剛剛的MSDN文章中擷取sample xml下來:


<?xml version="1.0" encoding="utf-8" ?>
<serviceModel xmlns="http://schemas.microsoft.com/practices/2011/entlib/autoscaling/serviceModel">
<subscriptions>
<subscription name="[subscriptionname]"
certificateThumbprint="[managementcertificatethumbprint]"
subscriptionId="[subscriptionid]"
certificateStoreLocation="CurrentUser"
certificateStoreName="My">
<services>
<service dnsPrefix="[hostedservicednsprefix]" slot="Staging">
<roles>
<role alias="AutoscalingApplicationRole"
roleName="[targetrolename]"
wadStorageAccountName="targetstorage"/>
</roles>
</service>
</services>
<storageAccounts>
<storageAccount alias="targetstorage"
connectionString="DefaultEndpointsProtocol=https;AccountName=[storageaccountname];AccountKey=[storageaccountkey]">
</storageAccount>
</storageAccounts>
</subscription>
</subscriptions>
</serviceModel>


其中:


subscriptionname 要被scale的目標Cloud Service的subscription name
managementcertificatethumbprint 目標Cloud Service的certificate thumbprint
subscriptionid 目標Cloud Service的subscription id
hostedservicednsprefix 目標Cloud Service的DNS prefix,例如testabc.cloudapp.net的話,就是testabc
targetrolename 要被scale的Role Name,在Portal的Role上可以找到
targetstorage 要存放performance資料的Storage位置,我會把這個位置設為與目標Cloud Service存放performance資料的Storage account相同
storageaccountname Storage account name
storageaccountkey Storage account key


接著打開Rule.xml,一樣從MSDN取得sample xml


<?xml version="1.0" encoding="utf-8" ?>
<rules xmlns="http://schemas.microsoft.com/practices/2011/entlib/autoscaling/rules">
<constraintRules>
<rule name="default" enabled="true" rank="1" description="The default constraint rule">
<actions>
<range min="2" max="6" target="[AutoscalingApplicationRole]"/>
</actions>
</rule>
</constraintRules>
<reactiveRules>
<rule name="ScaleUpOnHighUtilization" rank="10" description="Scale up the web role" enabled="true" >
<when>
<any>
<greaterOrEqual operand="WebRoleA_CPU_Avg_5m" than="60"/>
</any>
</when>
<actions>
<scale target="[AutoscalingApplicationRole]" by="1"/>
</actions>
</rule>
<rule name="ScaleDownOnLowUtilization" rank="10" description="Scale up the web role" enabled="true" >
<when>
<all>
<less operand="WebRoleA_CPU_Avg_5m" than="60"/>
</all>
</when>
<actions>
<scale target="[AutoscalingApplicationRole]" by="-1"/>
</actions>
</rule>
</reactiveRules>
<operands>
<performanceCounter alias="WebRoleA_CPU_Avg_5m"
performanceCounterName="\Processor(_Total)\% Processor Time"
source ="[AutoscalingApplicationRole]"
timespan="00:05:00" aggregate="Average"/>
</operands>
</rules>


其中,[AutoscalingApplicationRole]就是目標Cloud Service的Role Name,要跟Service.xml中targetrolename的值一致。

2012年12月7日

[Azure]計算VHD被Charge的容量

最近常遇到客戶詢問為什麼VHD每天被Charge的容量不大對。

Azure VHD是儲存在Page Blob中,並且只有需要(至於怎麼樣叫做需要,目前沒有文件說明;我測試的結果,OS Disk幾乎是全部計入,Data Dis則是部分計入,但,目前沒有任何保證)的部分會被寫入。因此在計算用量時,並不是Portal上看到30G就是30G計費。我寫了一個小程式來計算每天charge的容量:(這個程式計算出的結果可能還是與報表上有誤差,因為我沒有將一些屬性所占用的容量計算進去,不過已經相當接近了)

            string accountName = string.Empty;
string keyValue = string.Empty;

Console.WriteLine("Please input Storage Name”);
accountName = Console.ReadLine();

Console.WriteLine("Please input Storage Account Key");
keyValue = Console.ReadLine();

var storage = new CloudStorageAccount(new Microsoft.WindowsAzure.Storage.Auth.StorageCredentials(accountName, keyValue), false);
var blobClient = storage.CreateCloudBlobClient();
var vhds = blobClient.GetContainerReference("vhds");
var blobs = vhds.ListBlobs();
float totalBytes = 0;
float totalGB = 0;
float summaryGB = 0;
foreach (var blob in blobs)
{
var pageBlob = vhds.GetPageBlobReference(blob.Uri.Segments[blob.Uri.Segments.Length - 1]);
pageBlob.FetchAttributes();
var pageRanges = pageBlob.GetPageRanges();
totalBytes += pageRanges.Sum(x => x.EndOffset - x.StartOffset);


                totalGB = totalBytes / (1024 * 1024 * 1024);
summaryGB += totalGB;
Console.WriteLine(string.Format("Total GB for VHD[{0}] is {1}, Daily usage is {2} GB",
blob.Uri.Segments[blob.Uri.Segments.Length - 1],
totalGB,
totalGB / 31));

}
Console.WriteLine("Total VHD Size in storage is {0} GB", summaryGB);
Console.WriteLine("Daily usage is {0} GB", summaryGB / 31);
Console.ReadLine();

2012年11月30日

[Azure]在WebRole使用HTTPS Endpoint

  1. 打開VS,到Role –> Property->Certificates,加入一張已經存在Personal Certificate Store的憑證。(可以使用Self-signed,這邊就不針對如何產生憑證多做說明了) 

    image

  2. 到Role –> Property –> Endpoints,加入一個HTTPS Endpoint

    image

  3. 把憑證(PFX檔)上傳到Azure,必須要先建立好Cloud Service後,從Cloud Service的設定頁面上傳。

    image

  4. 接下來只要把程式佈署上去就可以啦。

2012年11月29日

[Azure]一些ACS相關的問題 (1)

  1. 使用VS2012使用ACS v2.0驗證時,透過Identity and Security…設定完ACS Namespace之後,在本機跑都很正常,但是放到雲端上就一堆錯誤。這問題主要是因為目前使用Identity and Security時,他會設定使用.Net Framework 4.5版本的assembly,但是現在除非我們在cscfg中去指定osfamily=”3”,使用Windows 2012 Server才會有.Net 4.5支援,否則的話只能使用.Net Framework 4.0。

因此我們必須手動修改相關設定,讓程式使用.Net framework 4.0。

首先設定完ACS後,打開VS2012,確定Target Framework是4.0

image

接下來要修改web.config,首先要將configuration section預設使用的<security.identityModel>與<security.identityModel.services>註解掉,新增以下這一行:

<section name="microsoft.identityModel" type="Microsoft.IdentityModel.Configuration.MicrosoftIdentityModelSection, Microsoft.IdentityModel, Version=3.5.0.0, Culture=neutral, PublicKeyToken=31bf3856ad364e35" />

接著把下面的<security.identityModel>與<security.identityModel.services>整段mark掉,換成下面這一段:

<microsoft.identityModel>
  <service>
    <securityTokenHandlers>
      <securityTokenHandlerConfiguration>
        <audienceUris>
          <add value=http://{your URL}/ />
        </audienceUris>
        <issuerNameRegistry type="Microsoft.IdentityModel.Tokens.ConfigurationBasedIssuerNameRegistry, Microsoft.IdentityModel, Version=3.5.0.0, Culture=neutral, PublicKeyToken=31bf3856ad364e35">
          <trustedIssuers>
            <add thumbprint="C75956CC7E0B8F90ED52A3AEF970465CD630F0E0" name=https://{ACS Namespace}.accesscontrol.windows.net/ />
          </trustedIssuers>
        </issuerNameRegistry>
      </securityTokenHandlerConfiguration>
    </securityTokenHandlers>
    <certificateValidation certificateValidationMode="None" />
    <federatedAuthentication>
      <cookieHandler requireSsl="false" />
      <wsFederation passiveRedirectEnabled="true" issuer=https://{ACS Namespace}.accesscontrol.windows.net/v2/wsfederation realm=http://{your URL}/ reply=http://{your URL}/” requireHttps="false" />
    </federatedAuthentication>
  </service>
</microsoft.identityModel>

然後設定runtime validation mode

<httpRuntime requestValidationMode="2.0" />

修改<system.webServer>如下:

<system.webServer>
  <modules>
    <!--<add name="WSFederationAuthenticationModule" type="System.IdentityModel.Services.WSFederationAuthenticationModule, System.IdentityModel.Services, Version=4.0.0.0, Culture=neutral, PublicKeyToken=b77a5c561934e089" preCondition="managedHandler" />
    <add name="SessionAuthenticationModule" type="System.IdentityModel.Services.SessionAuthenticationModule, System.IdentityModel.Services, Version=4.0.0.0, Culture=neutral, PublicKeyToken=b77a5c561934e089" preCondition="managedHandler" />-->
    <add name="WSFederationAuthenticationModule" type="Microsoft.IdentityModel.Web.WSFederationAuthenticationModule, Microsoft.IdentityModel" preCondition="managedHandler" />
    <add name="SessionAuthenticationModule" type="Microsoft.IdentityModel.Web.SessionAuthenticationModule, Microsoft.IdentityModel" preCondition="managedHandler" />

  </modules>

2012年11月28日

[Azure]Validation Errors: Total requested resources are too large for the specified VM size

While deploying my cloud project with all roles set to XS size VM, I got this error message stating my resource is too large for specified VM size.

As VM of XS size only have 20G C Drive, most likely I specified a local storage larger then 20G. So I checked my Role settings and found when creating cache worker role, the VM size defaults to Small, and diagnostic storage was set to 20G by default, hence exceed the size limit.

so the fix is to lower local diagnostic storage size.

image

2012年11月21日

[Azure]Tips to setup Hosting Solution Services

Update – 2012/11/29

這是安裝Microsoft Hosting Solution Services 的血淚史。

1.SQL Server Collation必須設定為SQL_Latin1_General_CP1_CI_AS,如果作業系統不是英文版,又是透過Web Platform Installer來裝SQL Express的話,安裝過程中沒辦法修改,可以參考這一篇的方式修改(我沒實測過)。

2.MySQL一定要裝,雖然安裝步驟上寫SQL Server or MySQL,但實測如果沒裝MySQL的話,Configure時會出現Invalid Object admin.UserCredential的錯誤。

3.每台機器上都要Enable Remote Administration Firewall Exception,用以下指令啟用:

netsh firewall set service remoteadmin enable

但是雖然啟用了上述的防火牆例外,我在安裝時還是遇到一堆因為防火牆導致安裝設定失敗的狀況(主要是RPC Fail),所以,安裝時就痛快地先關掉防火牆吧。

4.設定完SitesController後,就可以利用SitesController上的IIS Manager –> Web Farm來監控各個伺服器的設定進度。

5.在設定FrontEnd時,一直出現無法安裝某些特定元件的錯誤,所以直接RDP到FrontEnd機器,透過Web Platform Installer直接下載那些安裝失敗的元件,然後重開機,接著從Management Portal上把這台機器移除後重新加入即可。(講得很簡單,實際上這個動作可能會重複好幾次)

6.同上,安裝SitesWWS時,需要先到SitesWWS上手動安裝Web Farm Framework Agent。

7.SitesWWS, Add CloudAdmin to Administrators Group

8.SitesWWS, Install Web Deploy 3.0

9.SitesRESTAPI, create CloudAdmin account

10.最重要的一件事情是,在Controller上設定資料庫位置以及各個管理員帳號密碼時,一定要注意不要key錯了! (不然就會血尿很多天…)

11.安裝設定完成後,在使用Web Gallery建立網站時,可能會遇到無法下載Web Gallery的問題。我做了兩個改變解決這件事,但是目前不確定哪個改變解決問題:

1.把SitesMgmtPortal中IIS上的MgmtSvc-WebAppGallery的.Net Globalization裡的Culture與UI Culture都改為United State

2.把所有機器的控制台 –> 地區選項裡的時間格式改為yyyy-MM-dd HH:mm: ss

12.到SitesPublisher上,確定Web Management Service、Web Farm Agent Service和Web Deployment Agent Service是以啟動並且是自動執行。

12.如果遇到Unable to connect to remote server的錯誤,到SitesPublisher上,把WebFarm Agent Service重啟,然後把Dynamic WAS Service重啟幾次,應該可以解掉這個問題。

2012年11月16日

[Azure]查詢Azure SQL DB的使用量

連到要查詢的資料庫,然後執行下列命令。

select
      sum(reserved_page_count) * 8.0 / 1024
from
      sys.dm_db_partition_stats
GO

結果的單位是MB

2012年11月7日

[Azure]用REST API列出Storage Account下的Container

照著MSDN試了半天,終於發現順序還是很重要的。

假設我的Storage Account是slakchiprod,則我的request URL要是http:/slakchiprod.blob.core.windows.net/?comp=list

然後以下面這段程式碼來取得slakchiprod下的所有container。

            var utcTime = DateTime.UtcNow.ToString("R");
var xmsversion = "2011-08-18";
HttpWebRequest req = (HttpWebRequest)WebRequest.Create(new Uri(URL));
req.Method = "GET";
//下面這兩個Header的順序不能改...
req.Headers["x-ms-version"] = xmsversion;
req.Headers["x-ms-date"] = utcTime;
string stringToSign = "GET\n" +
"\n" + /*Content-Encoding*/
"\n" + /*Content-Language*/
"\n" + /*Content-Length*/
"\n" + /*Content-MD5*/
"\n" + /*Content-Type*/
"\n" + /*Date*/
"\n" + /*If-Modified-Since */
"\n" + /*If-Match*/
"\n" + /*If-None-Match*/
"\n" + /*If-Unmodified-Since*/
"\n" + /*Range*/
"x-ms-date:{0}\n" +
"x-ms-version:{1}\n" +
"/{2}/\n" + //URL
"{3}"; //Param
stringToSign = string.Format(stringToSign,
utcTime,
xmsversion,
storageAcct,/*slakchiprod*/
"comp:list");

HMACSHA256 crypt = newHMACSHA256(Convert.FromBase64String(key));
var buffer = crypt.ComputeHash(.UTF8.GetBytes(stringToSign));
var result = Convert.ToBase64String(buffer);
req.Headers["Authorization"] = "SharedKey " + string.Format("{0}:{1}", storageAcct, result);

req.GetResponse();//取得回應

2012年11月2日

[Azure]幾個上傳VHD的方式比較 (1)

剛好有客戶在做類似的東西,所以就順便比較看看。

首先一定要先確定在Local的VHD有開啟遠端桌面連線。

image

1.csupload –AddDisk, 沒有加-OS選項

目標VHD : Win XP 9GB Dynamic Disk, 沒有做過sysprep。

來不及抓圖了,這時,VHD檔案會被當作OS Disk,列在Virtual Machine->Disk中,沒有辦法用這個Disk建立VM。

2.csupload –AddDisk, 加了 –OS選項

目標VHD : Win XP 9GB Dynamic Disk, 沒有做過sysprep。

image

進入Portal、Virtual Machines、Create New Virtual Machine、My Disks可以看到剛剛上傳的VHD。可以用它來建立VM。

檢查Storage,看得到這個VHD,大小是127G。testadddisk1是我指定的label name。

image

用這個VHD來建立VM。

image

3.csupload –Add-Disk, 加-OS

目標VHD : Win 2008 30G Fixed Disk, 沒有做過sysprep。

image

可以在Virtual Machines、My Disks中找到她。

image

可以以此Disk建立VM。

image

2012年10月25日

[Azure] 上傳VHD到Azure作為Image

其實這個Topic在網路上可以找到一堆文章,不過自己做一次還是比較有安心的感覺:)

首先準備一個VM,然後進入系統。用Administrator權限執行sysprep,他的位置在:C:\windows\system32\sysprep

image

選擇BBOC,做完以後關機。按下OK就可以讓他跑下去了。

image

跑這個需要一段時間,我們先放下他來準備環境。

為了測試,首先我到Windows Azure Portal上建立一個測試用的Storage。

image

接著我們需要以Administrator權限來執行一些command line命令。

image

進入後,首先我們需要建立一張憑證來做為上船憑證,切換到C:\Program Files (x86)\Windows Kits\8.0\bin\x64,目錄位置可能會依環境不同而不同,找不到就直接搜尋makecert。用下列的命令建立一張憑證。

makecert –sky exchange –r –n “CN=VHDUploadTest” –pe –a –sha1 –len 2048 –ss My “VHDUploadTest.cer”

其中,CN=XXX與cer檔名都是可以改掉的。

image

接著回到Windows Azure Portal,把這張憑證上傳到Azure。

image

回到command line,切換目錄到Windows Azure SDK\bin。

image

首先要指定Connection String

csupload Set-Connection “SubscriptionID=xxx;CertificateThumbprint=xxx;ServiceManagementEndpoint=https://management.core.windows.net”

其中,Subscription ID是訂閱的Subscription ID,CertificateThumbprint則是剛剛那張憑證的Thumbprint。

image

設定完成後用下面這個指令上傳VHD到Azure。

csupload Add-PersistentVMImage –Destination “.blob.core.windows.net//">http://<StorageName>.blob.core.windows.net/<VHDFolder>/<VHDNAME>” –Label <VHDNAME> -LiteralPath F:\VHD\VMUpload.vhd -OS Windows

其中,<StorageName>是剛剛建立的Storage名稱,<VHDFolder>是上傳後的VHD Container名稱,<VHDName>則是VHD的名稱。

然後就會開始上傳了。

image

2012年10月24日

[Azure] Windows Media Service

Windows Media Service提供我們建置、管理和發布媒體的工作流程。由於目前還在Preview階段,要使用Media Service,首先需要到網站上申請試用。

image

待申請通過後,就可以到Windows Azure網站上建立一個新的Media Service了。建立的過程跟建立其他Azure服務一樣相當簡單,只需要注意DNS名稱不要重複就好了,建立完後進入Media Serivce頁面,可以在下圖圈起來的地方下載及安裝Media Service SDK。要注意的是,Media Service SDK還會另外需要WCF Data Service for OData 的功能,這個得要另外下載

image

安裝完成之後,就可以開始來踹踹看啦。

首先打開Visual Studio,建立一個一般的WinForm程式,加入以下的reference:

  • C:\Program Files\Windows Azure SDK\v1.6\bin\
    • • Microsoft.WindowsAzure.StorageClient.dll
  • C:\Program Files (x86)\Microsoft WCF Data Services\5.0\bin\.NETFramework\
    • • Microsoft.Data.Edm.dll
    • • Microsoft.Data.OData.dll
    • • Microsoft.Data.Services.Client.dll
    • • Microsoft.Data.Services.dll
    • • System.Spatial.dll
  • C:\Program Files (x86)\Microsoft SDKs\Windows Azure Media Services\Services SDK\v1.0\
    • • Microsoft.WindowsAzure.MediaServices.Client.dll

以上是Media Service、Storage Client以及WCF Data Service for OData的必要組件,加入後還有一件事情要做。因為目前的Media SDK版本是link到Azure SDK 1.6,因此所使用的StorageClient版本是1.1.0.0版的,如果我們的Azure SDK是1.6以上的版本的話,需要用binding redirect的方式把StorageClient組件指到新版本。在app.config裡加入這一段設定。

  <runtime>
<assemblyBinding xmlns="urn:schemas-microsoft-com:asm.v1">
<dependentAssembly>
<assemblyIdentity name="Microsoft.WindowsAzure.StorageClient"
publicKeyToken="31bf3856ad364e35"
culture="neutral" />
<bindingRedirect oldVersion="1.1.0.0"
newVersion="1.7.0.0"/>
</dependentAssembly>
<dependentAssembly>
<assemblyIdentity name="Microsoft.WindowsAzure.StorageClient"
publicKeyToken="31bf3856ad364e35"
culture="neutral" />
<publisherPolicy apply="no" />
</dependentAssembly>

</assemblyBinding>
</runtime>


首先,我想要上傳一個檔案到Media Service上,並且利用Media Service的轉檔功能幫我將檔案轉為MP4的格式。為此,我宣告一個MediaContext類別,讓這個類別來幫我處理一切的瑣事。


    public class MediaContext
{
const string AccountKey = "===key===";
const string AccountName = "===name==="
CloudMediaContext context = null;
public MediaContext()
{
context = new CloudMediaContext(AccountName,AccountKey);
}
//...


建立Media Context需要的Account Name與Account Key就是剛剛我們在Portal上建立的Media Service的Name與Key,可以在這裡拿到。


image


把程式碼中的Key與Name替換掉就可以了。


接著,我要想辦法把檔案上傳到Media Service中,並且讓他幫我轉檔。在Media Service裡,需要Media Service處理的事情都需要包成一個一個的Task,然後把這些Task組成一個Job丟給Media Service讓他幫我們做。因此在這裡,我先讓使用者選擇檔案,然後取得MediaProcessor作為轉檔的Processor。


//各種Media Service提供的MediaProcessor定義
public const string WindowsAzureMediaEncoder = "Windows Azure Media Encoder";
public const string PlayReadyProtectionTask = "PlayReady Protection Task";
public const string MP4toSmoothStreamsTask = "MP4 to Smooth Streams Task";
public const string SmoothStreamstoHLSTask = "Smooth Streams to HLS Task";
public const string StorageDecryption = "Storage Decryption";
//建立一個Asset,一個Asset可以視為一堆檔案的集合,可能包含媒體檔案或是設定檔等等
public IAsset CreateAsset(string localPath, bool requireEncrypt = true)
{
return context.Assets.Create(localPath, requireEncrypt ? AssetCreationOptions.StorageEncrypted : AssetCreationOptions.None);
}
//取得指定的Media Processor
private IMediaProcessor GetMediaProcessor(string name)
{
var processors = from proc in context.MediaProcessors
where proc.Name == name
select proc;
var processor = processors.FirstOrDefault();
if (processor != null)
{
return processor;
}
else
{
throw new NullReferenceException();
}
}
public void CreateNonStreamingJob(string inputFilePath, string outputFile)
{
//建立一個Asset,指定StorageEncrypt表示我們想把檔案內容在傳輸過程中壓密起來
var asset = context.Assets.Create(inputFilePath, AssetCreationOptions.StorageEncrypted);
//建立一個Job
var job = context.Jobs.Create(string.Format("ingestasset_{0}", DateTime.UtcNow.ToString("yyyyMMddHHmmssffffff")));
//把一個Task加入這個Job,指定Media Processor與configuration
var task = job.Tasks.AddNew("ingest", GetMediaProcessor(MediaProcessors.WindowsAzureMediaEncoder), "H.264 256k DSL CBR", TaskCreationOptions.ProtectedConfiguration);
//然後把input asset加進去,這就是我們要轉檔的來源Asset
task.InputMediaAssets.Add(asset);
//指定Output Asset,這就是轉檔結果的Asset
task.OutputMediaAssets.AddNew(outputFile, true, AssetCreationOptions.None);
//把Job丟給Media Service
job.Submit();
}


這樣Media Service就會開始幫我們轉檔了。透過Azure Storage Explorer瀏覽剛剛我們建立Media Service時指定的Storage,會看到一個一個Blob被建立。


image


轉檔可能會需要一段時間,這中間我們可以透過以下的程式碼來檢查Job的狀態。


        public string [] GetJobStatus()
{
List<string> status = new List<string>();
foreach(var job in context.Jobs){
if (job.State == JobState.Error)
{
status.Add(string.Format("* job {0} is {1}", job.Id, string.Join("\r\n", job.Tasks.Select(x => string.Join("\r\n", x.ErrorDetails.Select(c => c.Code + "-" + c.Message).ToArray())))));
}
else
{
status.Add(string.Format("* Job {0} is {1}", job.Name, job.State.ToString()));
}
}
return status.ToArray();
}


當然也可以刪除執行結果有問題的Job


        //刪掉失敗的Job
public void DeleteFailedJobs()
{
var jobs = (from job in context.Jobs
where job.State == JobState.Error
select job);
if (jobs != null)
{
foreach (var job in jobs)
job.Delete();
}
}


值得注意的是,目前SDK的物件對於Linq的支援度不大一致,有時會遇到不支援Linq語法的錯誤訊息,這時就只好袖子捲起來用一般的迴圈來處理了。


待轉檔完成,就可以把檔案下載到本機電腦了。


        public string [] DownloadtoLocal(string localFolder)
{
foreach (var job in context.Jobs)
{
if (job.State == JobState.Error)
continue;
foreach (var asset in job.OutputMediaAssets)
{
foreach (var file in asset.Files)
{
file.DownloadToFile(Path.Combine(localFolder, file.Name));
}
}
}
return null;
}

接著我們來試試看產生Smooth Stream。首先當然還是要建立一個Job。

        public void CreateStreamingJob(string inputPath, string outputPath)
{
var asset = context.Assets.Create(inputPath, AssetCreationOptions.StorageEncrypted);
var job = context.Jobs.Create("streamingJob_" + DateTime.UtcNow.ToString("yyyyMMddHHmmssffffff"));
//讀取config,這個檔案內容如下
var config = File.ReadAllText("config.xml");
var task = job.Tasks.AddNew("ingest_streaming", GetMediaProcessor(MediaProcessors.MP4toSmoothStreamsTask),
config,
TaskCreationOptions.ProtectedConfiguration);
task.InputMediaAssets.Add(asset);
var outputAsset = task.OutputMediaAssets.AddNew("stream_" + inputPath, true, AssetCreationOptions.None);
job.Submit();
}

一切都跟一般的轉檔差不多,只有Configuration的地方不大一樣,這邊可以用以下這個檔案內容船進去就可以了。

<taskDefinition xmlns="http://schemas.microsoft.com/iis/media/v4/TM/TaskDefinition#">
<name>MP4 to Smooth Streams</name>
<id>5e1e1a1c-bba6-11df-8991-0019d1916af0</id>
<description xml:lang="en">Converts MP4 files encoded with H.264 (AVC) video and AAC-LC audio codecs to Smooth Streams.</description>
<inputFolder />
<properties namespace="http://schemas.microsoft.com/iis/media/V4/TM/MP4ToSmooth#" prefix="mp4">
<property name="keepSourceNames" required="false" value="true" helpText="This property tells the MP4 to Smooth task to keep the original file name rather than add the bitrate bitrate information." />
</properties>
<taskCode>
<type>Microsoft.Web.Media.TransformManager.MP4toSmooth.MP4toSmooth_Task, Microsoft.Web.Media.TransformManager.MP4toSmooth, Version=1.0.0.0, Culture=neutral, PublicKeyToken=31bf3856ad364e35</type>
</taskCode>
</taskDefinition>


最後,我們要取得轉檔完成後,Client存取的URL。


        public void RevokeAllLocators()
{
foreach (var locator in context.Locators)
{
context.Locators.Revoke(locator);
}
}
//測試的結果,一個Asset最多只能同時關連到五個Access Policy
//因此,這邊我每次要指定新的Policy時,就先刪掉舊的
public void DeleteAllPolicies()
{
var existingPolicies = context.AccessPolicies;
foreach (var policy in existingPolicies)
{
context.AccessPolicies.Delete(policy);
}
}

public string[] ListStreamURLs()
{
List<string> ret = new List<string>();
//找到所有的Asset
foreach (var asset in context.Assets)
{
//副檔名為.ism的檔案就是提供Client Streaming的檔案
var ism = from file in asset.Files
where file.Name.EndsWith(".ism")
select file;

var manifist = ism.FirstOrDefault();

if (manifist == null)
continue;
//如果已經有Locator了,先刪掉他
//Locator會提供client存取的位置
foreach (var existingLocator in context.Locators)
{
context.Locators.Revoke(existingLocator);
}
//如果有已經存在的Access Policy,先刪掉他
var existingPolicies = context.AccessPolicies.Where(p => p.Name == "Streaming_Access_Policy_" + manifist.Name);
foreach (var policy in existingPolicies)
{
context.AccessPolicies.Delete(policy);
}
//建立新的Policy,開放存取五天
var accessPolicy = context.AccessPolicies.Create("Streaming_Access_Policy_" + manifist.Name, TimeSpan.FromDays(5), AccessPermissions.Read);
//建立新的Locator,從UTC時間的昨天起算
var urlLocator = context.Locators.CreateOriginLocator(asset, accessPolicy, DateTime.UtcNow.AddDays(-1));
//用這種方式組成URL
string urlForClientStreaming = urlLocator.Path + manifist.Name + "/manifest";
ret.Add(urlForClientStreaming);
}
if (ret.Count == 0)
return null;
return ret.ToArray();
}


產生出來的URL會長得像這樣子http://wamssinreg001orig-hs.cloudapp.net/37a39a1b-19fb-465b-a011-b121a61b784c/IMG_2354.ism/manifest


我們可以把這串網址貼到這裡來試試看是不是一切正常。

2012年10月15日

[Azure]在Work Role安裝軟體

其實沒那麼複雜,不過還是try了一下子,因此還是記錄下來。

這次要安裝的程式有兩個,Office 365 Powershell add-on跟O365登入小幫手。目的是要讓Work Role每一段時間就執行一些Office 365的administration作業。

一樣新增兩個Startup task在csdef裡。我用Role Content Folder來佈署我的安裝檔和相關作業的script檔案。

image

install1.cmd負責安裝Office 365 add-on,install2.cmd負責安裝登入小幫手。當然可以寫在一起,不過為了測試的目的,我先把這兩個分開。在Install1.cmd裡執行這個指令,因為Startup時執行目錄是Work Role所在目錄, 也就是%Root%\approot下, 因此這邊要用相對路徑指定msi檔的位置。/qn表示不要使用UI,並且把執行結果寫進msoidcrl-new.txt裡。

msiexec /qn /l* msoidcrl-new.txt /i Scripts\msoidcrl.msi


Update 2012/10/16 - 如果需要配和Powershell使用時, 由於預設系統對powershell script的權限是設定為allsigned, 我們通常需要在startup task中改為remotesigned或是unrestrict, 在Windows 2008 R2相容的Guest OS(也就是cscfg中osFamily = 2), 會使用Set-ExecutionPolicy remotesigned的方式來設定. 但這個指令需要較大的權限, 因此務必要在Startup Task中以elevated executionContext執行. 這個context會以Local System帳號權限執行.

2012年10月8日

[Azure]使用Windows Azure ACS與公司網路的AD做SSO整合–Part 1

我只能說…這真是一個漫長而充滿挑戰的過程…

首先, 準備一組AD環境來模擬公司網路的AD環境. 這邊我使用Windows Server 2012, 安裝AD DS, DNS, DHCP, Web Server在同一台機器上. 網域名稱是michaeldns.biz, Domain Controller電腦FQDN是pdc.michaeldns.biz.

由於目前還沒有要開始寫程式, 我只是單純地想要測試由Windows Azure ACS來整合內網的AD, 因此這邊我會先用一個根本不存在的網站來測試如何安裝與設定ADFS與Azure ACS, 預期是我應該要可以用預設的登入頁面來假裝要登入這個網站, 網站應該要向我要AD的帳密, 我驗證完成後, Azure應該要把我導到這個不存在的網站, 所以我雖然會得到一個HTTP 404錯誤, 但是應該要在IE上看到整個過程完成.

照著一般標準步驟做完dcpromo, 確定一切正常之後, 就可以準備安裝ADFS了.(這個步驟視情況大約需要1~2小時). 我在家裡的環境為了測試從外網接回AD Server大概多花了一個小時.

接著要來設定IIS的HTTPS憑證, 由於是測試, 這邊使用Self-Signed憑證來作為SSL連線使用的憑證. 進入IIS管理員, 左邊點選本台機器, 右邊雙擊Server Certificates

image

填上Friendly Name, 然後確定Certificate Store選到Personal後按確定即可

image

完成圖

image


接下來要開始安裝ADFS 2.0. 在2012 Server上安裝ADFS 2.0只需要從Server Manager中新增AD Federation Service這個Role就可以了, 安裝過程沒有甚麼需要特別注意的地方, 只要一直下一步就可以了 (不需要安裝ADFS 1.0相關的服務, 也不需要安裝ADFS Proxy). 安裝完成後可以在Server Manager的Dashboard上看到AD FS已經安裝完成

image

接著我們要來設定ADFS, 從這邊開啟ADFS管理員

image

點這裡開始設定

image

這裡直接按下一步, 因為現在是第一台ADFS伺服器

image

這邊可以選擇Standalone伺服器或是準備建立Federation Server Farm, 這裡我選擇Federation Server Farm然後按下一步

image

由於剛剛已經先設定好了IIS的SSL, 這裡系統會自動抓到剛剛設定的憑證, 按下一步.

image

我是重新安裝, 因此這裡可以把舊的資料庫刪除以確保都是新的資料

image

選擇Service Account, 如果是建立Server Farm的話, 所有的Service都需要使用這個帳號.

image

按下一步就會開始設定了

image

視情況會出現一兩個警告. 第一個是說host/[Computer FQDN]這個SPN已經存在了. 第二個是說因為有照到之前設定的ADFS網站, 因此安裝程式沒有再建立一個新的. 這邊可以直接忽略.

image

如此初步的設定就完成了, 稍後我們還會需要回來這裡做ADFS的設定.

現在, 讓我們到Windows Azure Portal上來設定ACS

進入舊版管理網站後, 先建立一個ACS Namespace. 建立的過程相當直觀, 選好區域跟名稱案確定就可以了, 我的測試namespace是MichaelVirtualNet

image

接著選擇剛剛建立的Namespace, 按存取控制服務

image

這會讓我們進入ACS管理介面, 首先新增一個Identity Provider

image

選擇新增一個WS-同盟識別提供者

image

輸入相關資訊. 在WS-同盟中繼資料的部分可以直接從我們剛剛設定的ADFS網站來下載. 其網址為https://[HOST IP]/FederationMetadata/2007-06/FederationMetadata.xml , 或是下載後儲存在以檔案的方式上傳. 設定完成後按儲存即可.

image

接下來要新增信賴憑證者應用程式

image

在這裡會需要填上實際上的應用程式的網址, 但是現階段我根本還沒有要開始寫東西, 我只是想先確定這整個架構是正常的, 因此這邊我先隨便填一個https://vnclient.com, 稍後我會把這一塊的程式補上

image

同一個畫面下半段的部分, 基本上只有識別提供者的部分需要視需求選擇, 這裡我選擇我的網站可以使用Windows Live ID, Google ID與我們的AD進行登入

image

儲存. 接下來要設定規則群組. 可以選擇新增, 或是修改剛剛系統幫我們產生的預設群組. 這裡我選擇修改預設群組

image

點擊群組名稱就可以進入設定畫面. 整個規則設定的邏輯大約是

如果[識別提供者]是[XXX], 且[輸入宣告型別]是[OOO], 且[輸入宣告值]等於[任何值]或是特定值.

把輸入型別轉型成我想要的型別, 並且值為前端傳遞過來的值或是特定值

說起來很繞口, 其實就是在做mapping而已.

這邊我們把識別提供者Google所傳過來的http://schemas.xmlsoap.org/ws/2005/05/identity/claims/name 這個值, 轉換為http://schemas.xmlsoap.org/ws/2005/05/identity/claims/name (也就是直接傳遞)

設定完成大概會是這樣

image

接著到應用程式整合, 把WS-同盟中繼資料這一段copy起來.

回到ADFS管理員, 點中間這個Link

image

跳過歡迎畫面後, 把剛剛那一段網址貼到這裡來然後按下一步

image

這邊選擇Permit all users to access this relying party

image

下一步到最後, 確定這裡有打勾

image

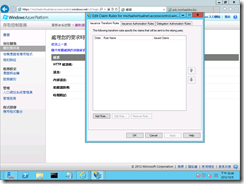
結束剛剛的精靈之後會自動帶出Edit Claim Rules的畫面, 按下的[Add Rules]

image

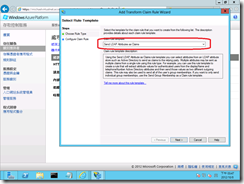
因為要整合AD, 這邊選擇Send LDAP Attributes as Claims

image

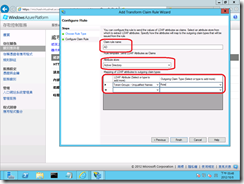
隨便給一個rule name, 在Attribute Store的地方選擇Active Directory. 然後Mapping of LDAP attribute to outgoing claim types的地方新增一筆把Token-Groups – Unqualified Name對應到Role的紀錄

image

按確定結束設定.

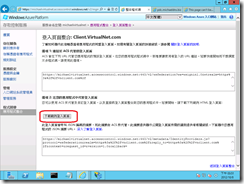
到這邊基本上已經設定完成了. 接著要來測試一下剛剛的設定是不是都正確.因為還沒開始部署程式, 所以我們先來借用ACS Portal上的範例登入畫面來測試.

image

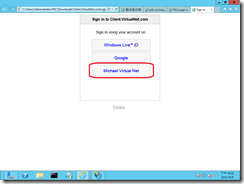
下載後會看到剛剛設定的三個識別提供者都出現在列表裡, 其中Michael Virtual Net是我們的AD整合. 點她後會跳出AD驗證的登入視窗, 輸入ID Password後, 會看到IE網址列會開始詢問pdc.michaeldns.biz以及Azure ACS網址, 最後驗證完成之後, 就會把我們導向剛剛所設定的那個不存在的網址(http://vnclient.ocm). 到這邊應該可以認定設定應該都沒有問題了, 接下來就要實際上寫個程式放到雲端上來跟AD整合了.

image

Blog Archive

About Me